How to add manually products on Google Merchant
Do you use Google Merchant Center?
This powerful tool allows you to showcase your products on Google Shopping, reaching a wider audience and potentially boosting your sales. But before potential customers can discover your amazing products, you need to add them to your Merchant Center account. This wiki will walk you through the process of manually adding products.
Why Manually Add Products?
While Google Merchant Center offers automated feed options for large inventories, manual addition might be the way to go for you if:
- You have a small product selection (less than 10 items).
- You have unique or custom-made products with specific details.
- You prefer more granular control over individual product information.
Gather Your Information Before You Begin
To efficiently add products, it’s helpful to have all the necessary details on hand. So, here’s a checklist:
- Product Title: A clear, concise description of your product (e.g., “Red Running Shoes for Men”).
- Product Description: A detailed description highlighting features and benefits (e.g., “Breathable mesh upper, comfortable cushioning, perfect for your daily run”).
- Link to your product landing page: The web address where customers can view and purchase the product on your website.
- High-quality product image: A visually appealing image that showcases your product (at least 800 x 800 pixels).
- Price: The current selling price of your product.
- GTIN (optional): A Global Trade Item Number (e.g., UPC, EAN, ISBN) used for identification (if applicable).
- Brand: The manufacturer of your product.
- Product Category: Google’s pre-defined category that best describes your product (e.g., Apparel & Accessories > Shoes > Running Shoes).
Adding Products Manually
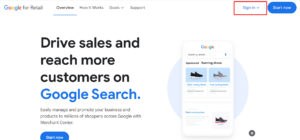
Step 1: Sign in to your Google Merchant Center account. However, if you haven’t created a Google Merchant account yet, head over to https://www.google.com/retail/ to set one up. It’s a free service!
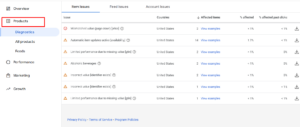
Step 2: Then, navigate to the “Products” section. On the left-hand navigation menu, look for “Products” and click on it.
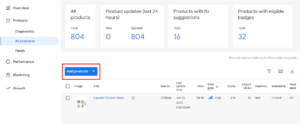
Step 3: Click the “Add products” button. You’ll typically see a blue button with a plus sign (+) in the top right corner.
Step: 4 Choose “Add products one by one.” This option allows you to manually enter information for each product.
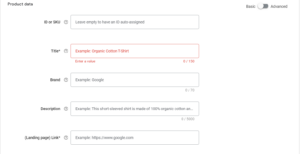
Step: 5 Fill in the required product data fields. Here are some key details:
- Title: Enter your product title following Google’s guidelines. Keep it informative, accurate, and under 150 characters.
- Description: Craft a compelling description that highlights your product’s features, benefits, and target audience. Aim for 500 characters or less.
- Link: Provide the accurate web address where customers can view and purchase the product on your website.
- Image: Upload a high-quality image that showcases your product clearly. Google recommends a minimum resolution of 800×800 pixels. Moreover, you can also add additional images to provide different views of your product.
- Price: Enter your product’s current selling price, including currency (e.g., USD 49.99).
Step 6: Fill in the optional and recommended, product data fields for your Google Merchant store. Providing additional details can improve your product’s visibility and user experience:
- GTIN: If you have a GTIN for your product, include it. This helps Google accurately identify your product.
- Brand: Specify the brand name of your product.
- Product category: Select the most relevant pre-defined Google product category for your item. You can use Google’s product category taxonomy [invalid URL removed] as a reference.
Step 7: (Optional) Add product variants. Do you have variations of the same product (e.g., different colors or sizes)? If so, click “I have clothing or variant products” under the “Detailed product description” section. This allows you to specify the different variations and their corresponding attributes (e.g., color: red, size: medium).
Step 8: Review your product information. Check twice all the details you’ve entered to ensure accuracy. Typos or misleading information can negatively impact your product’s performance.
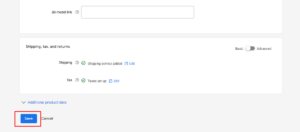
Step 9: Click “Save.” Congratulations! You’ve successfully added your first product to your Google Merchant Center.
Optimizing Your Product Listings for Better Performance
While adding products is a crucial step, there’s more you can do to make your listings shine on Google Shopping. You can hire a Google Merchant service provider for the best outcome.
Here are some additional tips:
- Use high-quality images: Visuals are a powerful selling tool. Invest in professional product photos or use high-resolution images with a clean background.
- Write compelling product descriptions: Highlight the unique features and benefits of your product. Also, use keywords that potential customers might search for, but avoid keyword stuffing.
- Keep your information accurate and up-to-date: As your product details change (e.g., price, stock availability), update your Merchant Center information promptly.
- Utilize all relevant product attributes: The more information you provide, the better Google understands your product and can match it with relevant searches.
- Monitor your product performance: Google Merchant Center provides tools to track how your products are performing in Google Shopping searches. Use this data to identify areas for improvement, such as optimizing titles and descriptions.
You can effectively add and manage live products in Google Merchant Center by following these steps and leveraging the available resources. However, you should remember that providing accurate and compelling product information is key to unlocking the full potential of Google Shopping and reaching a wider audience for your e-commerce business.
Virtual Assistant Service
Get in touch

